Troubleshooting
This document summarizes common SDK issues. Always complete the general checks first to ensure the robot is in a runnable state, then verify status/version information, and finally troubleshoot specific symptoms.
Quick Navigation
If your issue is not listed below, jump to Still Not Resolved? at the end of this page.
Use this unified order first:
- General Checks (Do These First): confirm emergency stop is released, then confirm the robot is not in
ABNORMALmode. Normal operating mode is the prerequisite for all robot functions. - System and Configuration: after mode is normal, verify robot/SDK version alignment.
- Specific issue symptoms: follow the corresponding section.
If you want to check robot status or version:
- How to Check the Current Operating Mode
- How to Check the Robot System Version
- How to Check Robot System and SDK Version Compatibility
- Emergency Switch (E-Stop) Overview
- Onboard Computing Units (HPU + XCU)
- How to Access HPU and XCU
- How to Check Robot SN
- How to Check Whether Joints Are Healthy
If the robot does not move or respond:
- No Response to Control Commands
- SDK Works on Robot but Fails over Wired PC Connection
- Robot Joint Cannot Move
- Robot Enters Abnormal Mode: Restart Services
- Robot Enters Abnormal Mode: Localization Service Error
- Robot Chassis Cannot Move
- End Effector Control Failure
- No Sound from Robot Speaker
If this is a system configuration issue:
- How to Enable Real-Time End-Effector Control Commands
- Where Joint Limits Are Configured
- Enable/Disable a System Service
- embosa IP Configuration Reverted After Reboot
If this is a camera-related issue:
- How to Change Camera Resolution
- How to Check Camera Frame Rate
- How to Check Camera Intrinsics/Extrinsics and Calibration Info
If this is another issue:
- Where SDK Logs Are Stored
- Where Low-Level Service Logs Are Stored
- How to Enable and Debug Core Dumps
- Python on Robot Cannot Find a Module
- Python Example Error:
numpyHas NotypeDict - How to Start SDK Docker
- How to Use Perception Service (GBS 1.15.16+)
Before You Start
- Run log/process commands on the correct platform first:
- HPU: localization, navigation, planning, perception services.
- XCU: motion-control services.
- Quick rule: if robot is connected but cannot move / motion is abnormal, check XCU first; if robot can move but map/path/obstacle/perception is abnormal, check HPU first.
- Paths, service names, and config keys are case-sensitive.
- For PC-side remote deployment, verify network and IP configuration are effective before deeper troubleshooting.
General Checks (Do These First)
- Emergency stop: confirm the red emergency stop button on the robot back is released (popped up).
- Operating mode: run
/data/bin/sys_toolon XCU and confirm mode is notABNORMAL. - Abnormal service location: if mode is
ABNORMAL, check/userdata/log/mission_manager/mission_manager.INFOand searchabnormal_service. Recover normal mode first. - Status/version check: only after mode is normal, check SN, system version, and mode details.
- Service status: check key services by issue type (
singorix,galbot_chassis_service, etc.).
Control and Motion
No Response to Control Commands
Complete the General Checks first, then continue with the control chain.
Check main log:
tail -f /userdata/log/SingoriX/info/singorix_wbcs_main.INFO
Check singorix process:
ps -ef | grep singorix | grep -v grep
If singorix is running but control still does not respond, check chassis-related processes:
ps -ef | grep chassis
For PC-side deployment, configs may be reverted after reboot. Check enable_modify_embosa_cfg in /data/config/system.cfg on both HPU and XCU. If set to false, embosa_ip_config.json will not be overwritten during reboot flow.



SDK Works on Robot but Fails over Wired PC Connection
Symptom: SDK programs run correctly on the robot itself, but fail when running from a wired PC connection.
Common cause: embosa_ip is misconfigured, or config was reset.
Recommended handling:
- Verify network configuration first, especially PC/XCU/HPU IPs and
embosa_ip_config.json. - Reference: PC-Side Deployment - Ubuntu / 2. Network Configuration
- If config is correct but gets reset again, use: embosa IP Configuration Reverted After Reboot
Robot Joint Cannot Move
This section applies when a joint in the head, leg, or arm becomes unresponsive.
First check singorix log to identify the specific error:
tail -f /userdata/log/SingoriX/info/singorix_wbcs_main.INFO
Possible Cause 1: Joint Exceeds Motion Range Limit
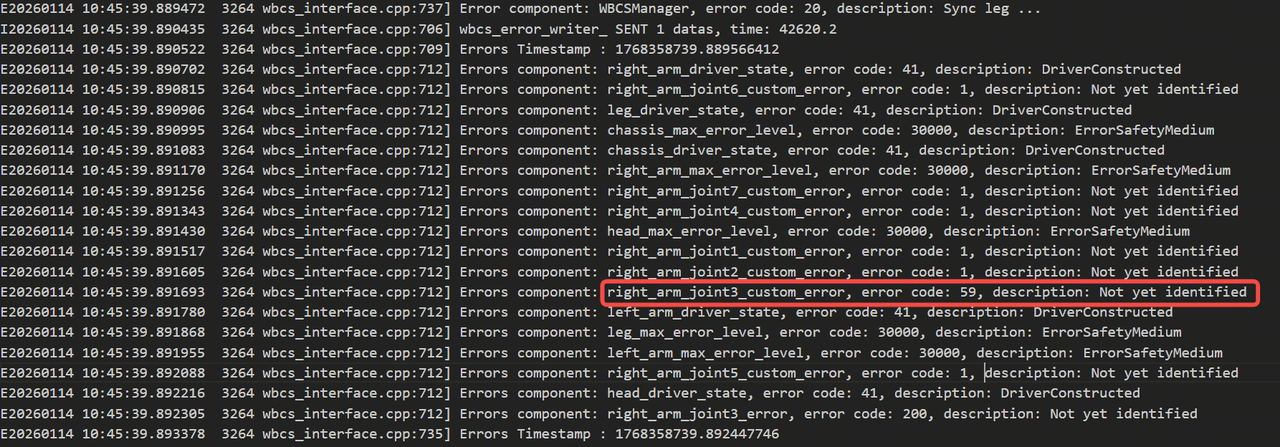
The joint may have reached or exceeded its mechanical limit. This is more common in arm joints and can be visually observed through abnormal posture. SingoriX will output corresponding error messages.
Joint Out-of-Limit Recovery
Recommended order:
- Hold the teach button and manually drag the arm back within joint limits.
- If it cannot be dragged, identify which joint is over-limit. Hidden brake-release buttons are available near joint 2 and 3.
- Remove the piston, press emergency stop, then press the hidden brake-release button and drag the arm back within limits.
- Release (twist open) emergency stop and check whether joint recovers.
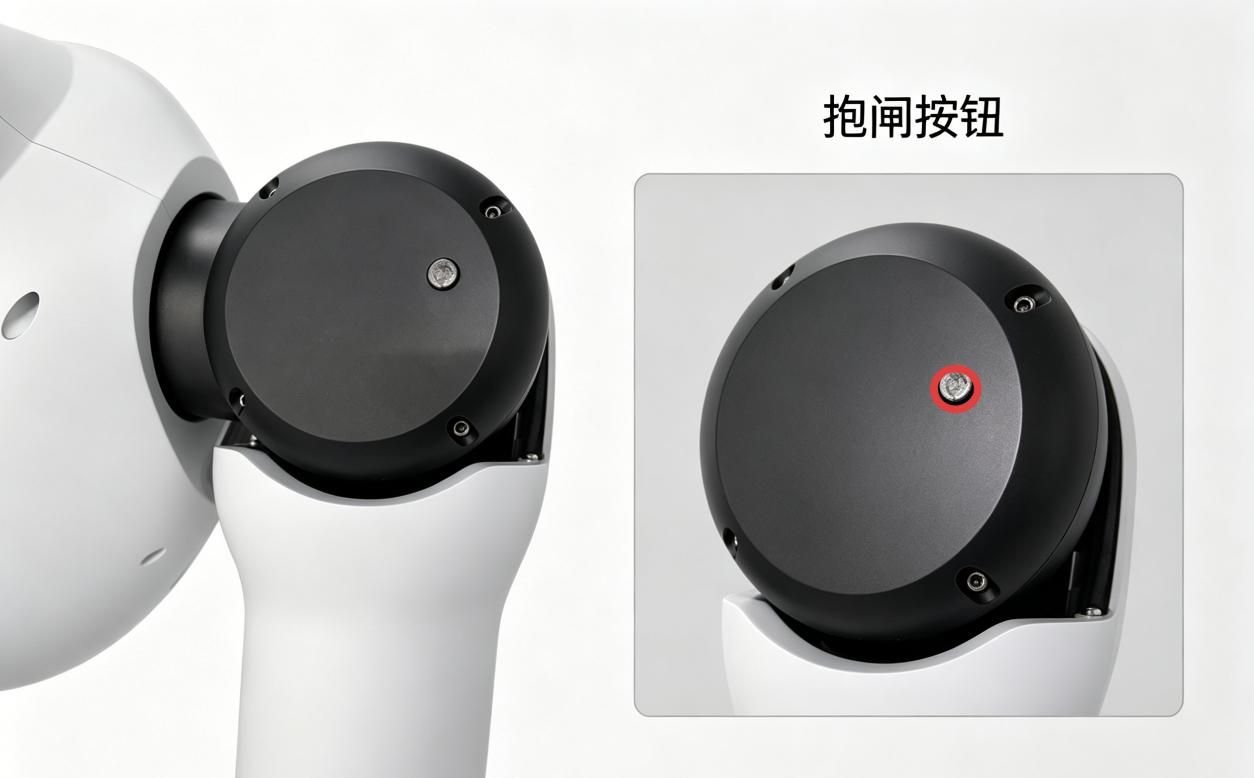
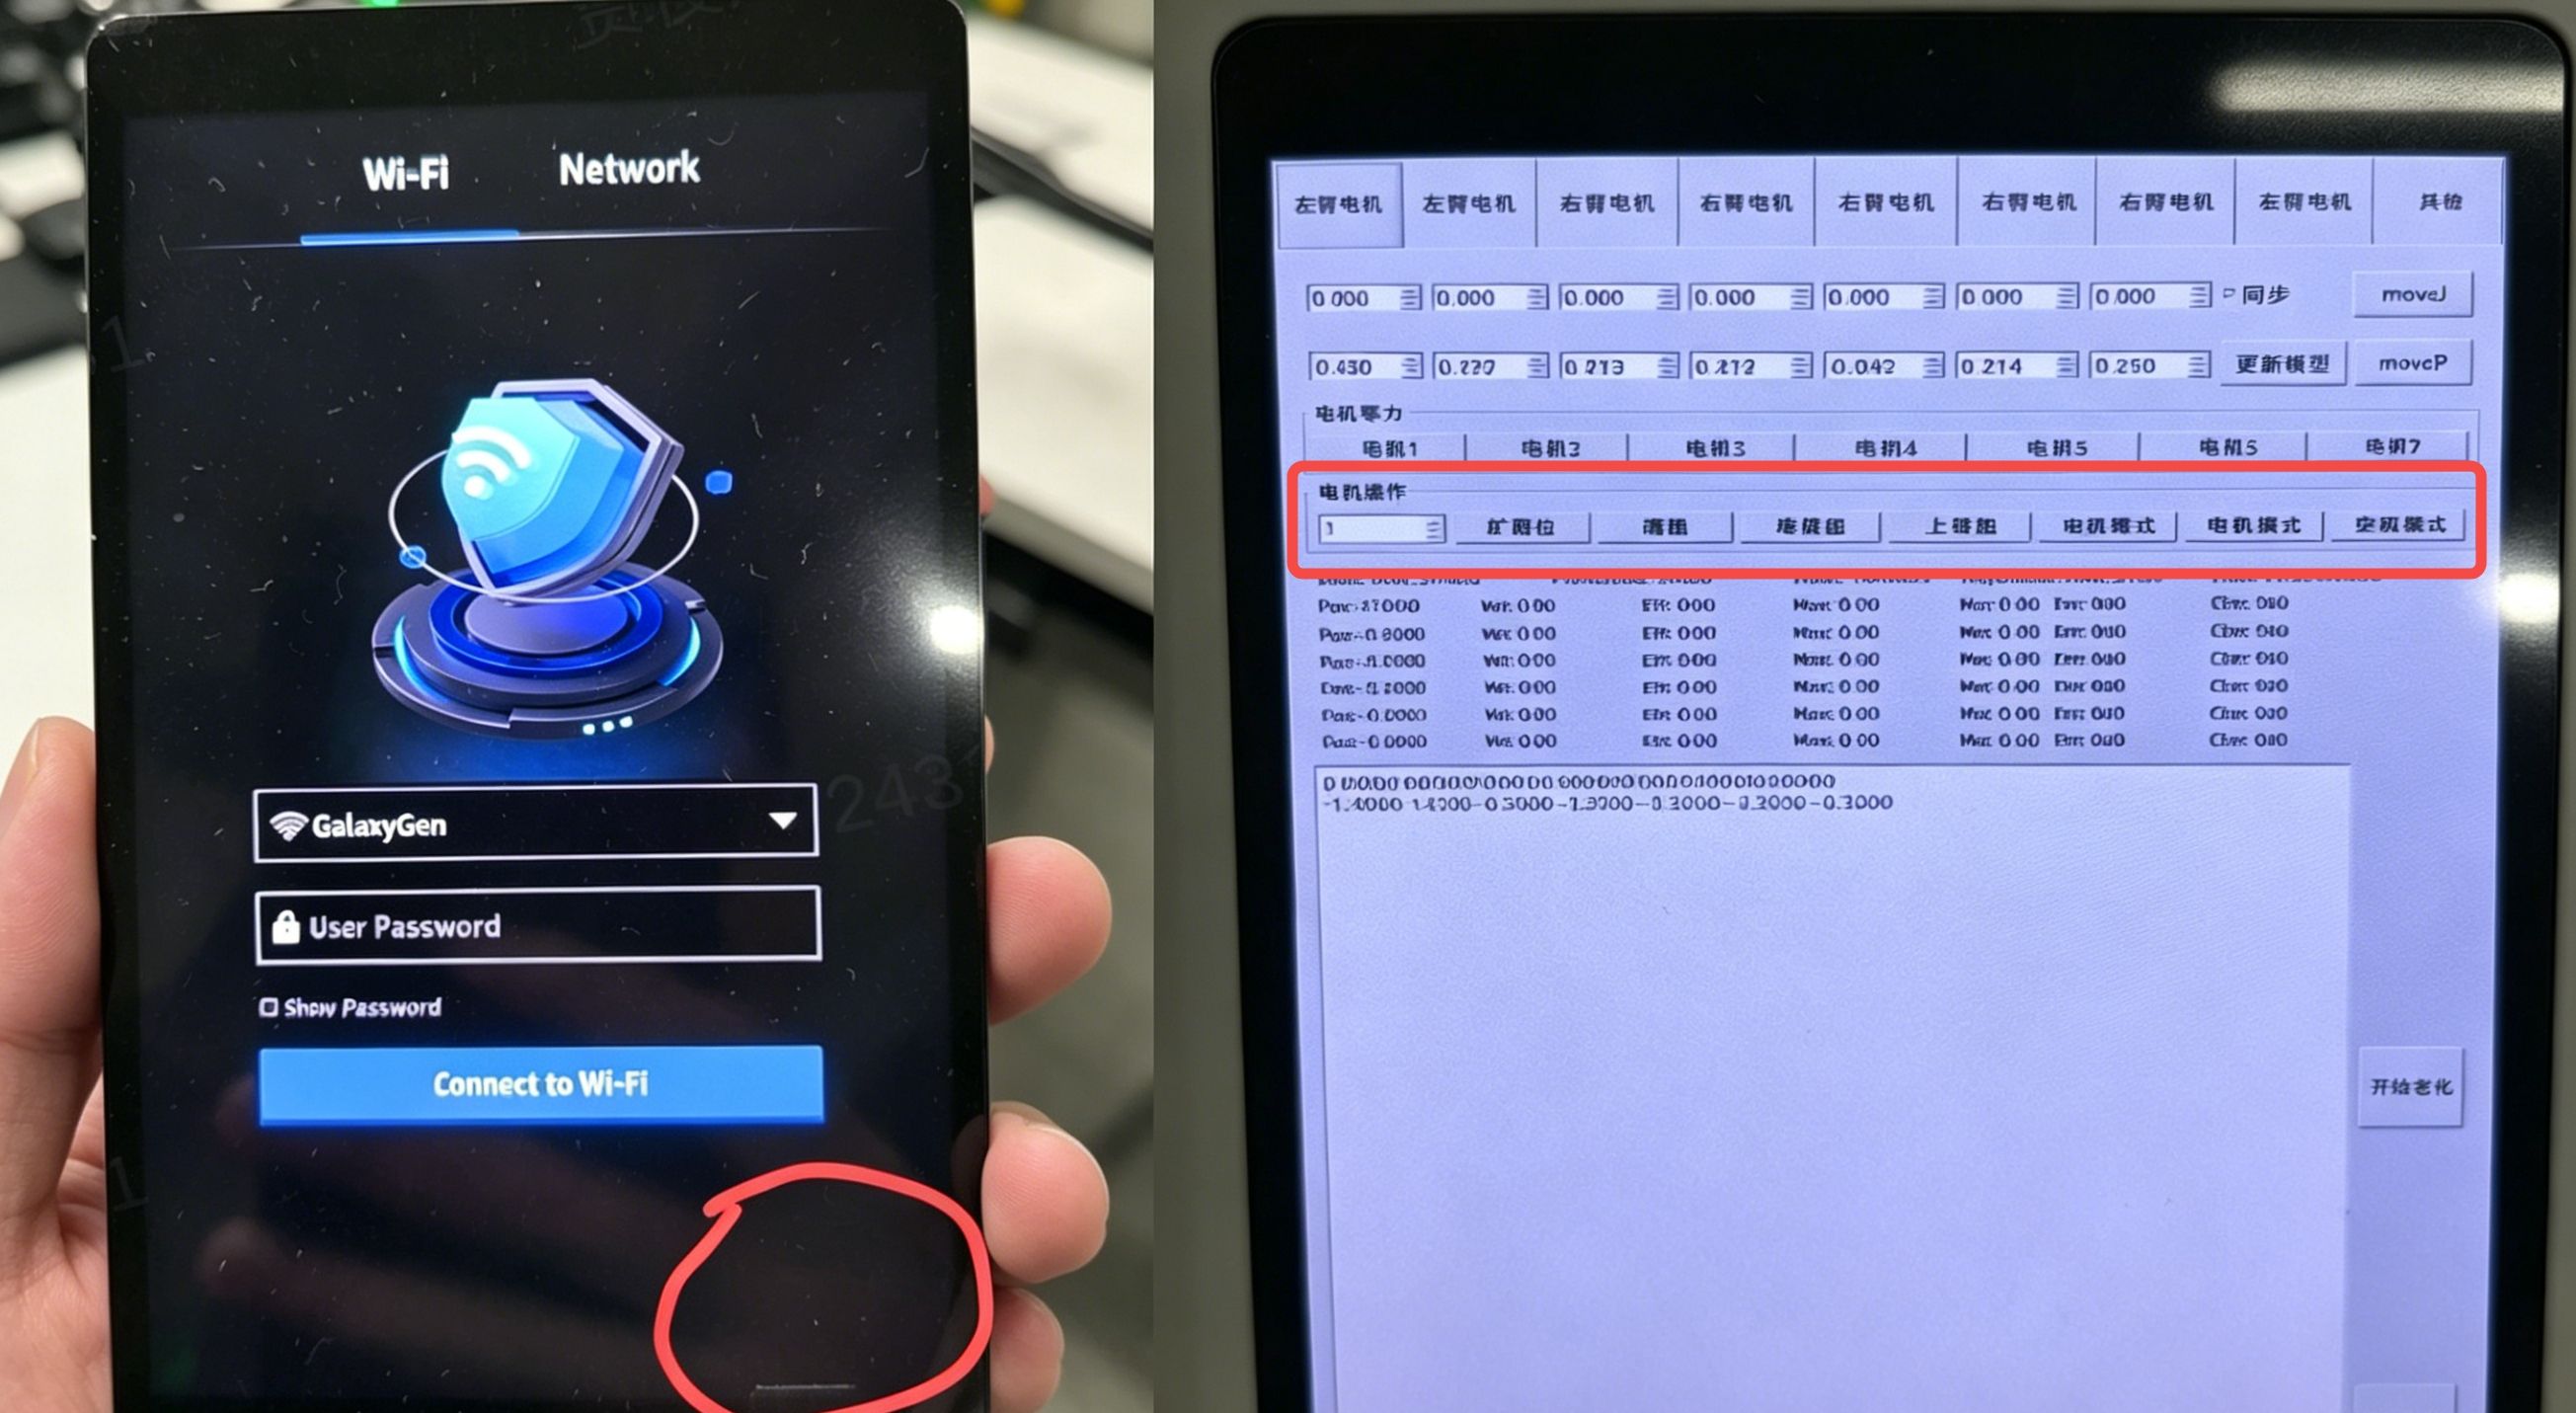
If the over-limit joint has no hidden brake-release button, use Method 2:
- Enter
service_displaybackend: continuously tap the lower-right corner of the chest screen until backend login appears, then enter password996996. - After login: open Left Arm Motor or Right Arm Motor -> Motor Operation.
- In the first input box, enter the target joint index (for example joint
4). - Press emergency stop, then release it, and wait
10s. - Click in order: Idle Mode -> Limit Extension -> Clear Fault -> Clear Fault -> Clear Fault -> Clear Fault -> Enable -> Current Mode (interval at least
1sbetween clicks). - Check whether the target joint can rotate. If not, repeat Step 4 and Step 5.
- After handling, run on XCU to exit this interface and restore normal run state:
systemctl restart launcher
Possible Cause 2: Joint Initialization Failure
The joint failed to release the brake during robot startup (no brake release sound). SingoriX will output initialization failure error messages.
The following screenshot shows an example of head joint initialization failure:

Recommendation: Restart the robot and listen for brake release sound during startup.
Possible Cause 3: MCU Failure
The Microcontroller Unit (MCU) may have encountered an error or stopped responding. Check the latest log files in the following directories to verify logs are continuously updating without errors:
/userdata/log/mp_core//userdata/log/secure_core/
Robot Enters Abnormal Mode: Localization Service Error
Symptom: robot enters ABNORMAL and reports localization service error.
Common on new robots.
Common cause: mapping has not been completed, so localization cannot run correctly.
Recommended handling:
- Confirm whether mapping has been completed.
- If not, complete mapping and localization first.
- After mapping, run on HPU:
sudo systemctl restart launcher.service
- Re-check mode and confirm recovery to
WORKING_MODE.
Reference:
Robot Enters Abnormal Mode: Restart Services
If robot enters abnormal mode, a common quick recovery is restarting launcher.
- On XCU:
systemctl restart launcher
- On HPU:
sudo systemctl restart launcher
Robot Chassis Cannot Move
If chassis cannot move, complete General Checks first, then check service status and battery.
Check chassis service:
ps -ef | grep galbot_chassis_service | grep -v grep
Check SOC:
tail -f /userdata/log/galbot_chassis_service/galbot_chassis_service.INFO | grep soc
When SOC is below 25%, chassis enters protection stop. Charge first.


End Effector Control Failure
First complete General Checks, then do end-effector specific checks: press and release emergency stop and observe basic response. If there is no response at all, prioritize hardware-fault investigation.
If there is response but behavior is incorrect, verify configuration consistency.
/data/config/SingoriX/galbot_one_golf/real/robot_config.toml
For version 1.16+, overlay path is:
/data/config/default/SingoriX/galbot_s1-v2.0/robot_config.toml
Default is left gripper + right suction cup. Confirm physical installation matches config (for example right_suction_cup vs right_gripper). Restart launcher after modification:
systemctl restart launcher

No Sound from Robot Speaker/Enable Audio Service galbot_vtn
On Orin/HPU, edit:
/data/config/launcher.cfg
Change target enable from false to true, then:
sudo systemctl restart launcher
systemctl status launcher

System and Configuration
How to Check the Current Operating Mode
Use sys_tool on XCU.
- Login XCU:
ssh root@192.168.xxx.xx
# password: 12345678
- Start tool:
cd /data/bin
./sys_tool
sys_tool is located at /data/bin/sys_tool. It supports baseline version query and robot mode query/switch.
Common commands:
v: query baseline version info (includes SN, software/hardware version).q: query current robot mode.
Mode judgment:
- Normal should show
mode_type: WORKING_MODE. - If not
WORKING_MODE(for exampleABNORMAL), locateabnormal_servicefirst via General Checks.
Example (q key fields):
current mode:
mode_type: WORKING_MODE
mode_switch_state {
  status: SUCCESS
}


How to Check the Robot System Version
Recommended:
galbot_sdk check-version
If the robot uses a non-default IP address:
galbot_sdk check-version --robot-ip <robot-ip>
If unavailable, on XCU or HPU:
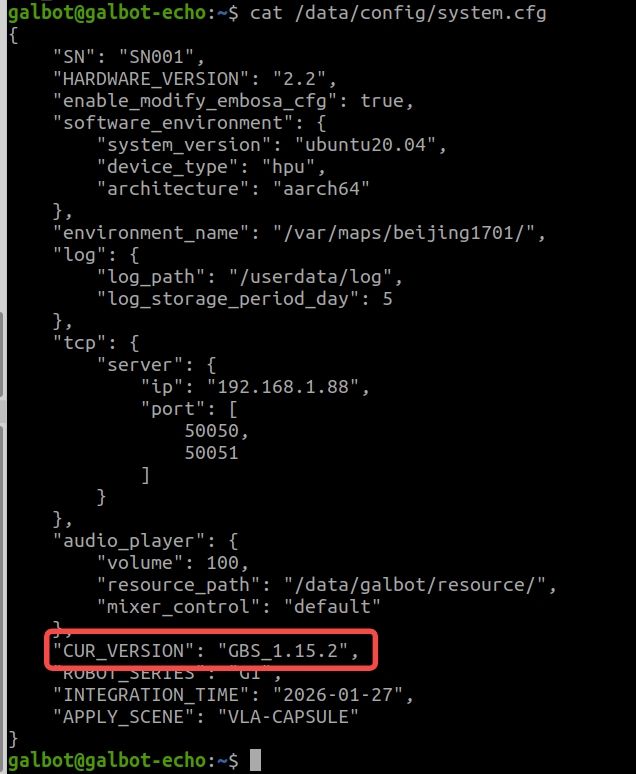
cat /data/config/system.cfg
Check CUR_VERSION.
How to Check Robot System and SDK Version Compatibility
galbot_sdk check-version
Common options:
# Specify a non-default robot IP address
galbot_sdk check-version --robot-ip <robot-ip>

# Show full compatibility matrix
galbot_sdk check-version --list

# Offline manual validation
galbot_sdk check-version --sdk-version 1.8.0 --robot-version GBS_1.16.0
Compatibility matrix (from output/check_robot_compat.py):
| SDK Version Range | Robot System Version (GBS) |
|---|---|
| 1.5.0 ~ 1.7.99 | GBS_1.15.x |
| 1.8.0 ~ 1.8.99 | GBS_1.16.x |
If mismatch occurs, upgrade robot system version to match SDK requirement first; only downgrade SDK if robot version must remain unchanged.
Emergency Switch (E-Stop) Overview
The emergency stop button is located in a prominent position on the robot body. It is a red mushroom-head button.

The remote emergency stop button is located in the middle of the remote controller. It is a red button.
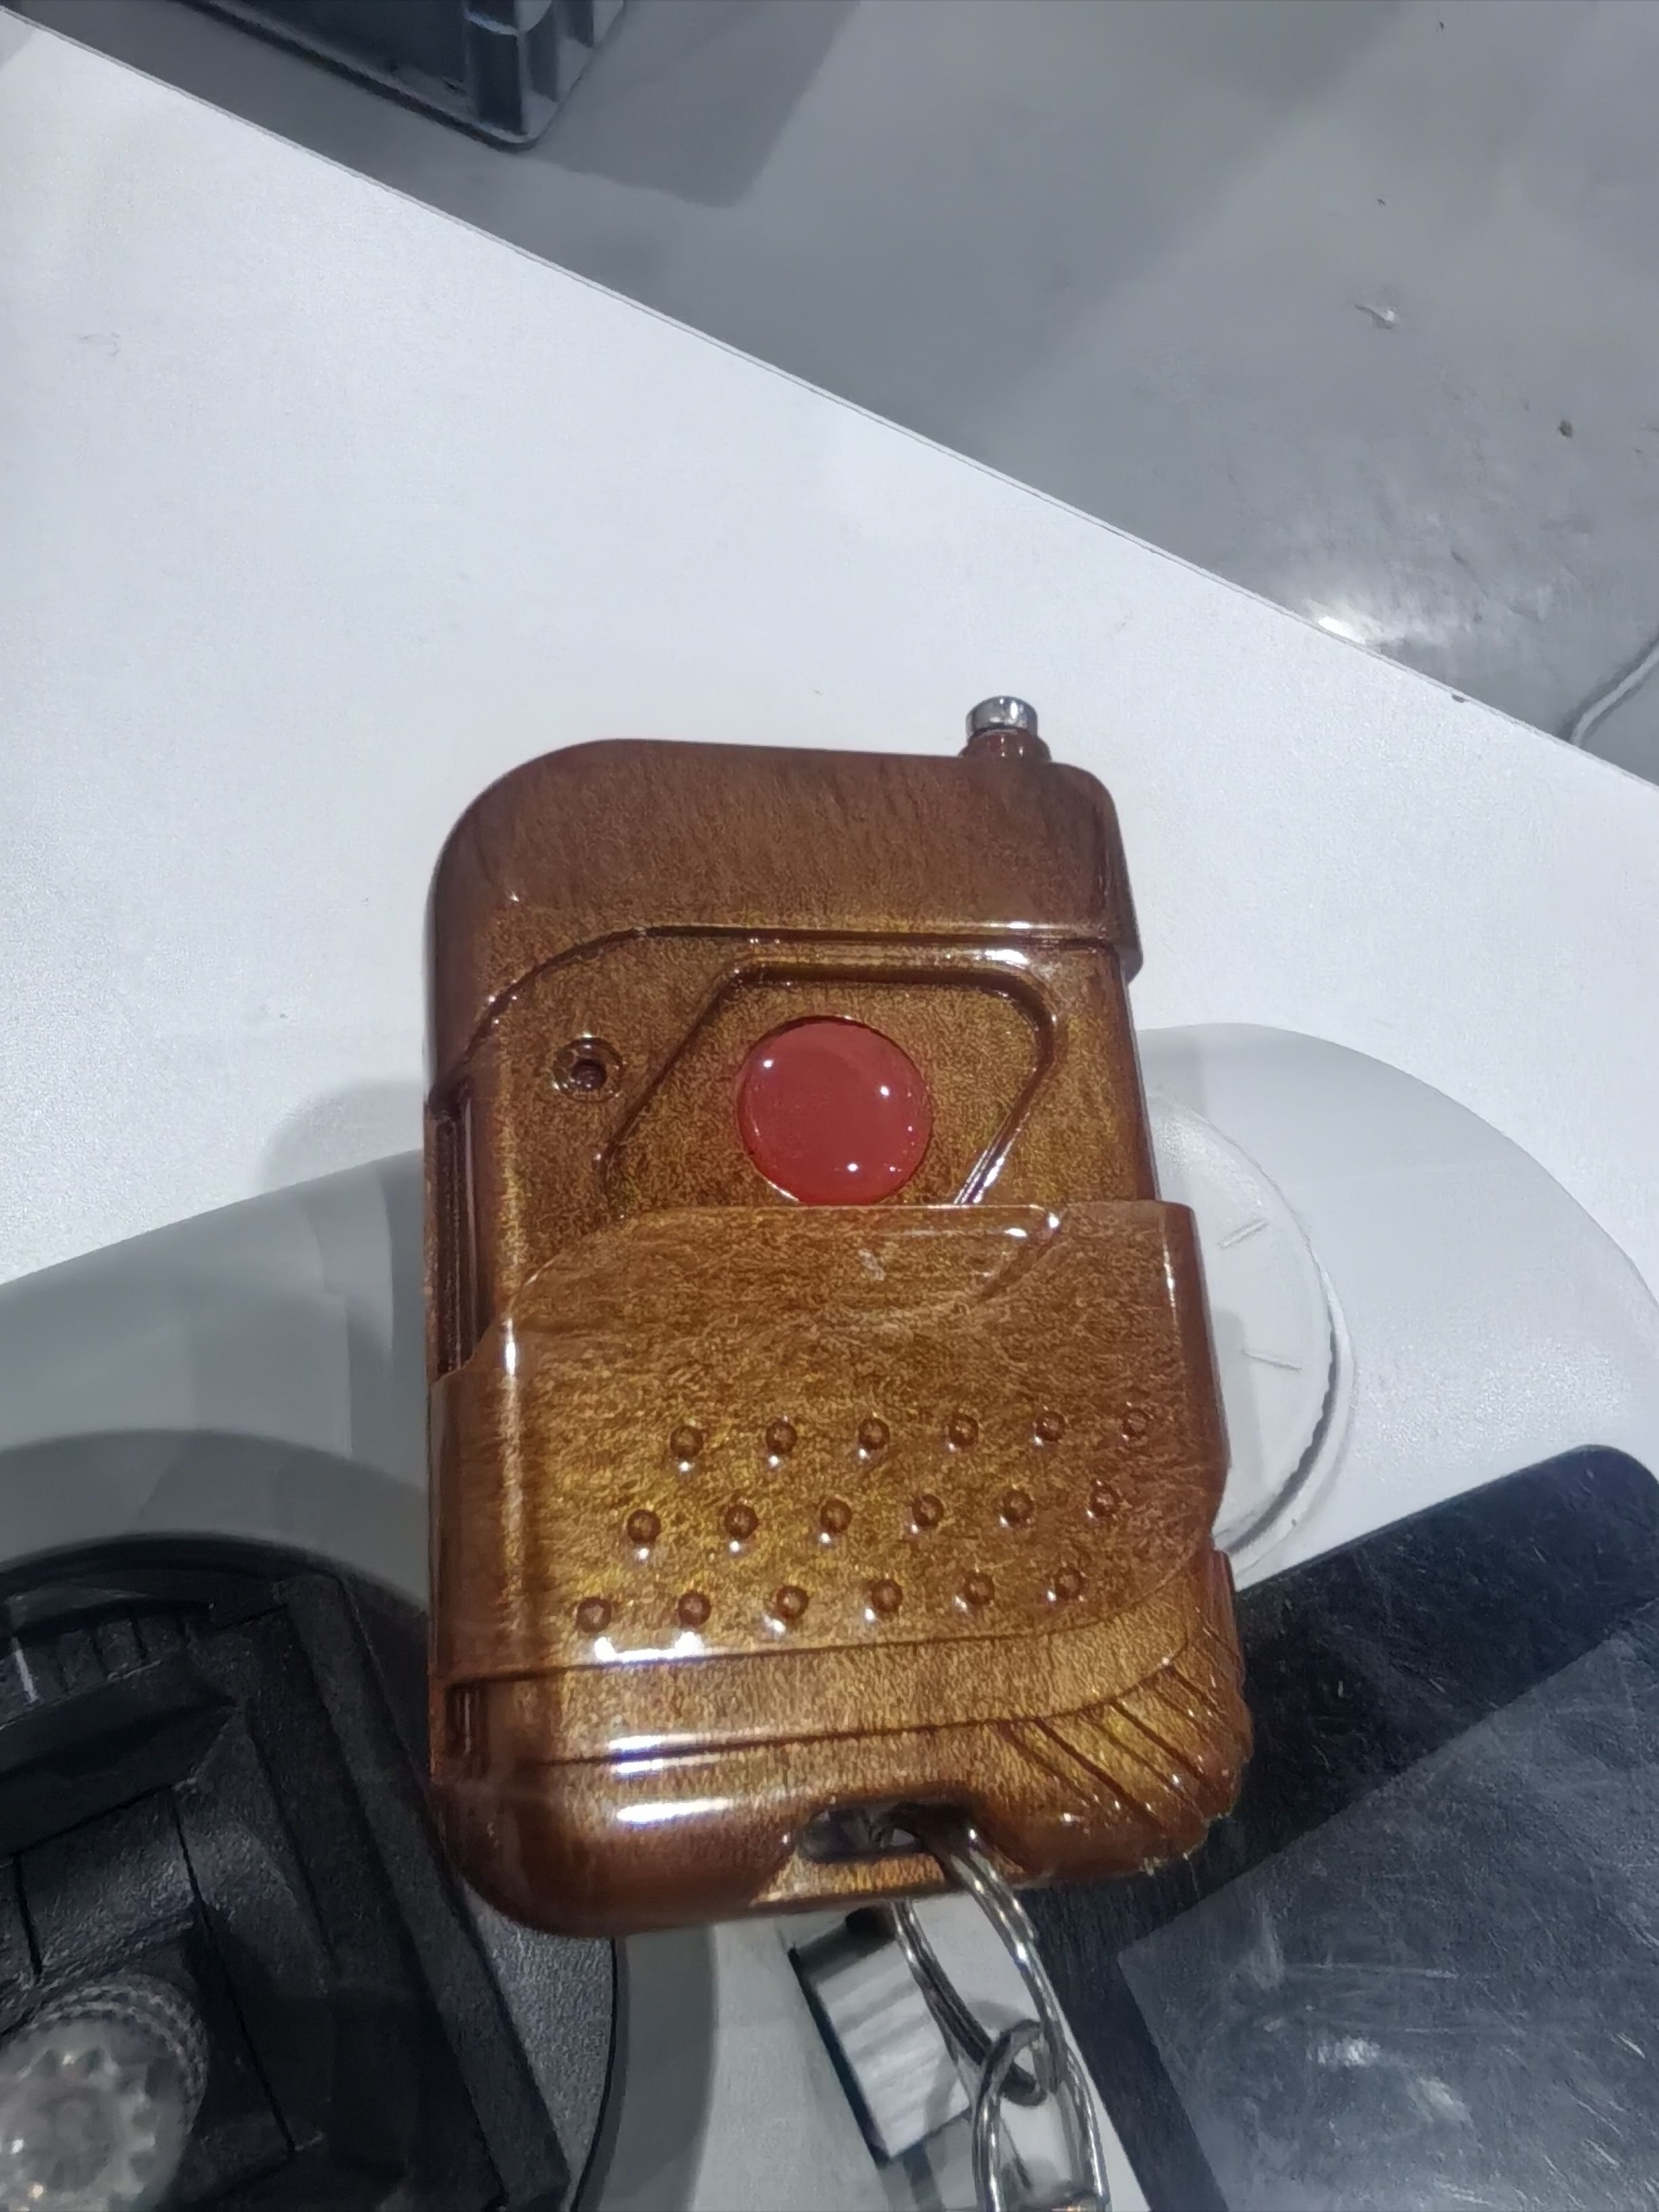
Usage:
- If equipment abnormality or personal safety risk is detected, press emergency stop immediately.
- After emergency stop is triggered, the robot terminates all motion immediately. The device remains powered on; only motion and actuators are locked.
- The emergency stop button self-locks after being pressed. If the robot-body emergency stop is pressed, rotate it to release. If the remote-controller emergency stop is pressed, press the button again to release.
- After release, tap restore on the robot screen. The robot can then resume motion and control.
Onboard Computing Units (HPU + XCU)
Galbot robot onboard computing uses a dual-compute-unit architecture: HPU (High-Performance Unit) + XCU (X Computing Unit).
HPU handles high-compute tasks such as vision perception, AI inference, motion planning, and navigation. XCU handles low-level motor control, joint actuation, and real-time control.
| Compute Unit | Full Name | Responsibility | Typical Tasks |
|---|---|---|---|
| HPU | High-Performance Unit | High-compute tasks | Vision perception, AI inference, motion planning, navigation, SLAM |
| XCU | X Computing Unit | Real-time control tasks | Low-level motor control, joint actuation, real-time control |
- Hardware: HPU uses NVIDIA Jetson Orin (64GB, 275 TOPS); XCU is the real-time control-side processor.
- System software: customized Linux with real-time kernel patches for deterministic motion control.
- Architecture note: both HPU and XCU are
ARM64 (aarch64); useaarch64toolchain for binaries running on these platforms.
Why two compute units:
- Real-time isolation: motor control needs deterministic microsecond-level response; vision inference can occupy GPU for hundreds of milliseconds.
- Fault isolation: if HPU-side AI crashes, XCU can still maintain low-level control and standing posture.
- Scalability: future compute upgrades can focus on replacing Orin while keeping XCU real-time firmware stable.
How to Access HPU and XCU
Get login IP by:
- Checking wireless IP on robot
Networkscreen. - Wired PC-robot direct connection fixed IPs:
- XCU:
192.168.100.66 - HPU (Orin):
192.168.100.88
- XCU:
Login and credentials:
- HPU (Orin):
ssh galbot@<Orin_IP>
# password: gb@2023
- XCU:
ssh root@<XCU_IP>
# password: 12345678
Run ping first, then ssh.
How to Check Robot SN
On XCU:
/data/bin/sys_tool
Follow tool prompts to view device information.
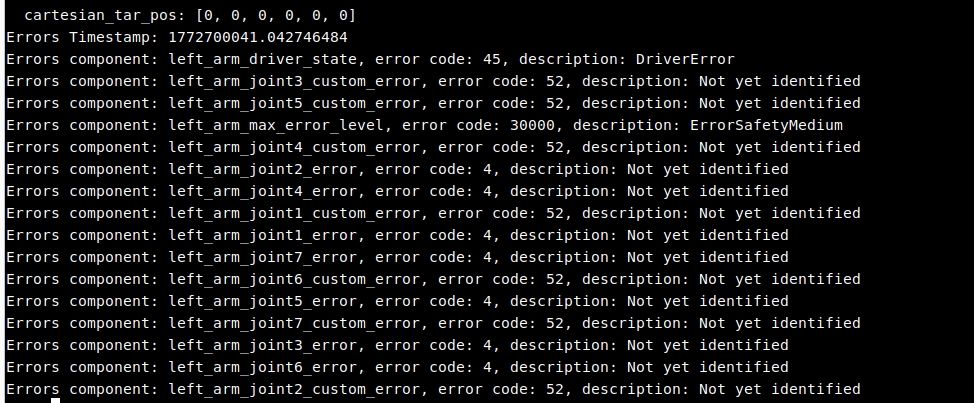
How to Check Whether Joints Are Healthy
Login XCU and open joint diagnostic tool, input r to view status.
No Errors generally means joints are normal. If emergency-stop or high joint-speed errors appear, reset first then retest.

How to Enable Real-Time End-Effector Control Commands
On XCU, modify:
/data/config/default/SingoriX/galbot_s1-v2.0/robot_config.toml
Set using_wbc to true, then restart launcher.
Where Joint Limits Are Configured
IK, planning, and control all use the same joint limits from URDF: galbot_one_golf.urdf.
- XCU:
/data/config/galbot_description/galbot_one_golf_description - HPU:
/data/galbot/config/galbot_description/galbot_one_golf_description
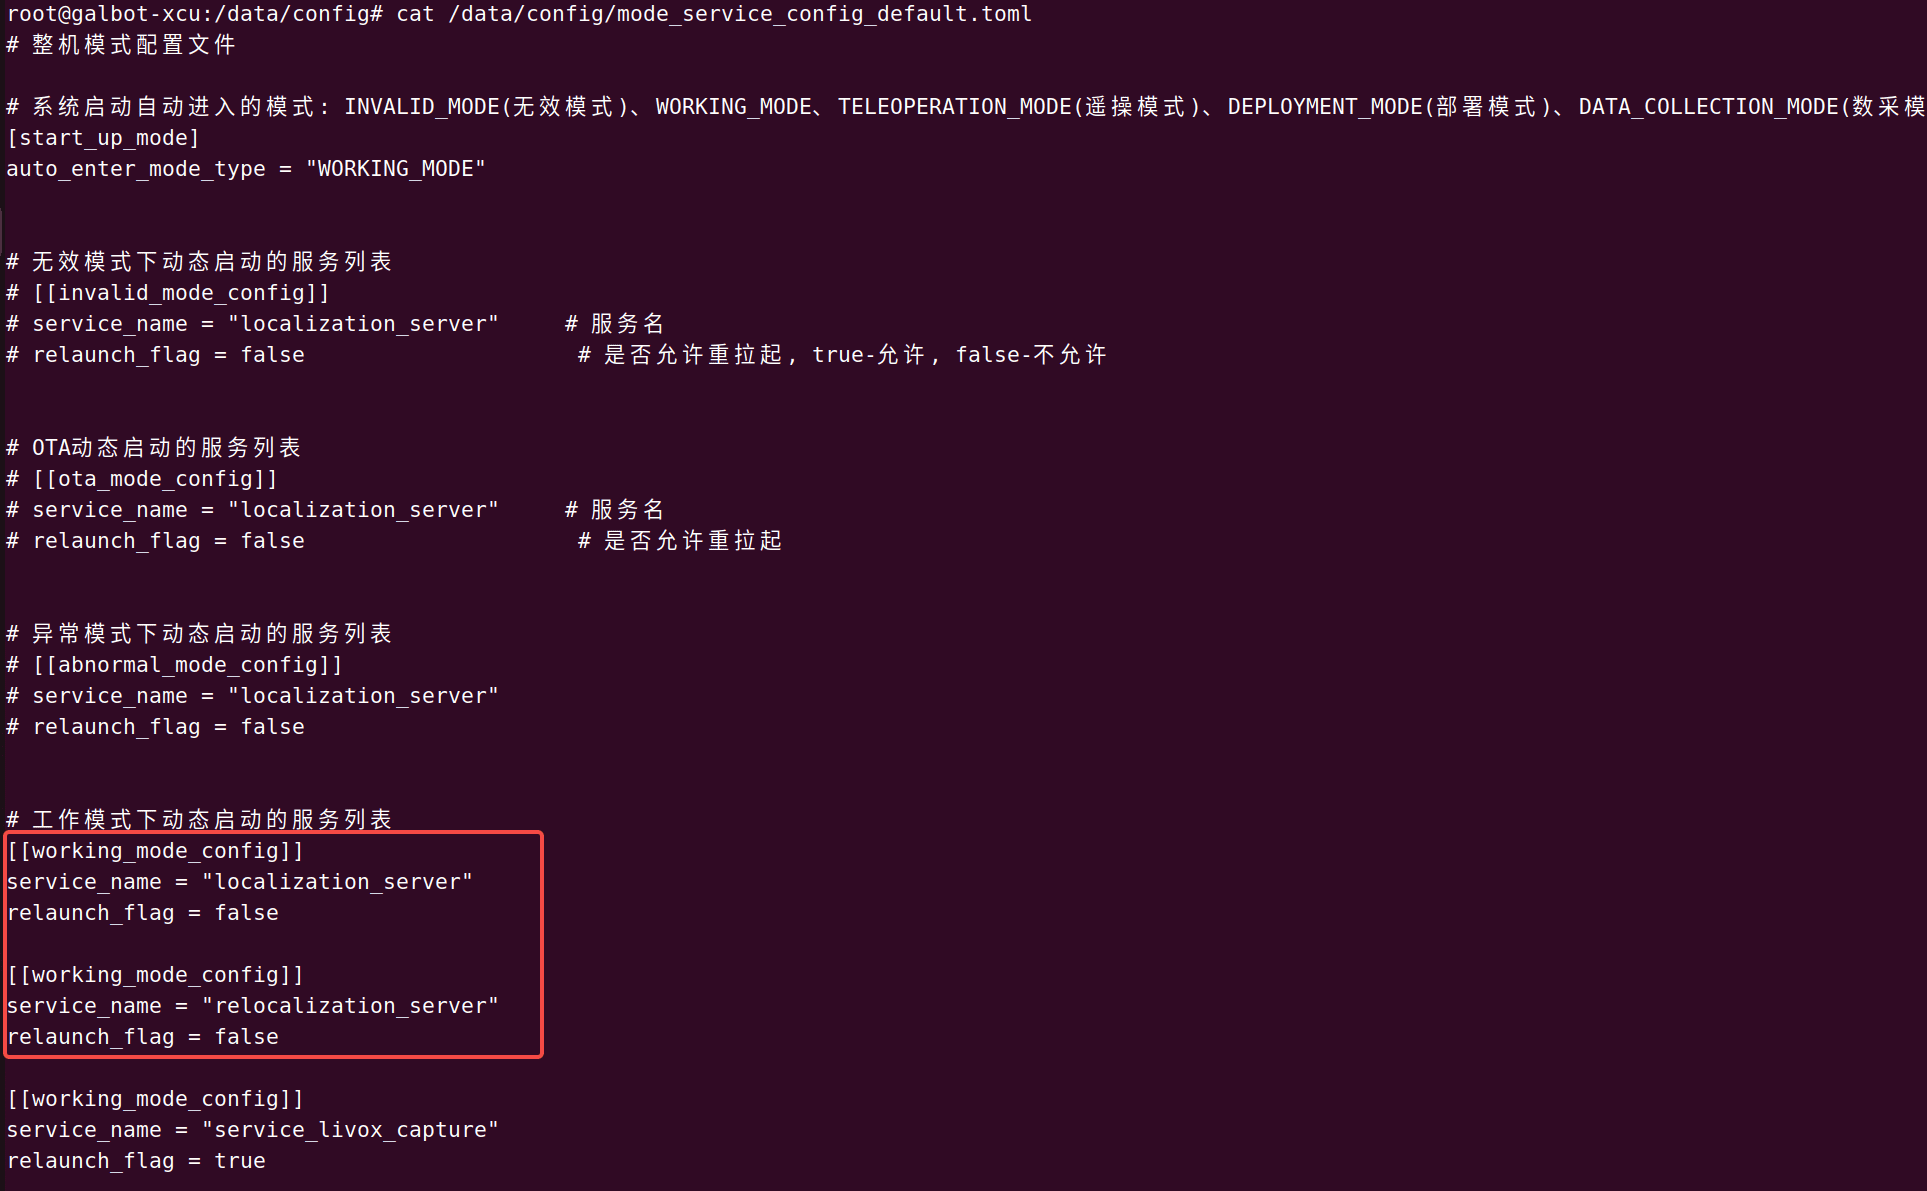
Enable/Disable a System Service
Determine whether the target service runs on HPU or XCU, login the corresponding platform, then edit:
/userdata/user_config/mode_service_config_default.toml
Comment/uncomment the target service item, then restart launcher on that same platform:
systemctl restart launcher
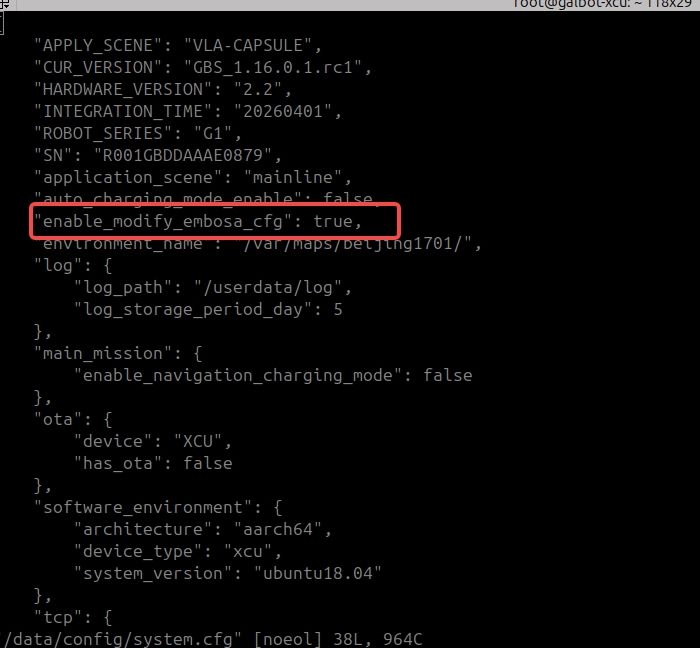
embosa IP Configuration Reverted After Reboot
On both XCU and HPU, set enable_modify_embosa_cfg=false in /data/config/system.cfg, then restart launcher on each side.
Camera and Calibration
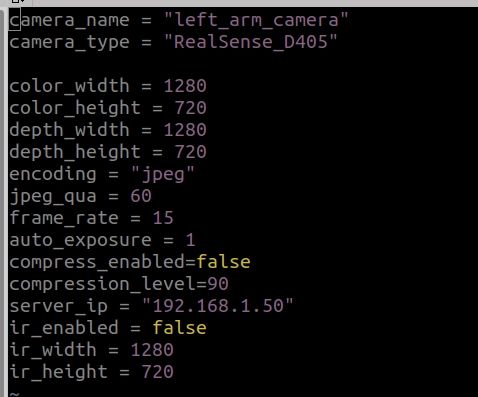
How to Change Camera Resolution
On Orin, modify:
/data/galbot/config/right_arm_camera.cfg/data/galbot/config/left_arm_camera.cfg/data/galbot/config/front_head_camera.cfg
Changes take effect after robot reboot. With multiple sensors enabled simultaneously, lowering resolution can improve stability.

How to Check Camera Frame Rate
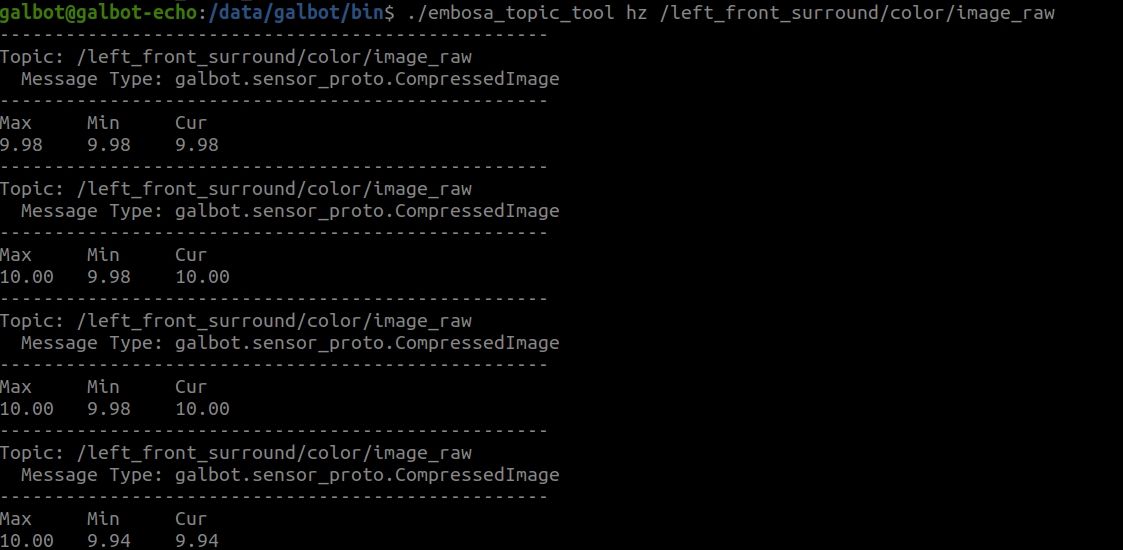
Check config in /data/galbot/config/xxx.cfg, then use /data/galbot/bin/embosa_topic_tool on HPU to measure topic rate.

How to Check Camera Intrinsics/Extrinsics and Calibration Info
On XCU:
cat /userdata/config/robot_config/eyehand_calib.toml
cat /userdata/config/robot_config/stereo_camera_intrinsic.toml
You can also use SDK interfaces. Example for left-arm camera extrinsic:
transform = robot.get_transform(
    target_frame="base_link",
    source_frame="left_arm_camera_color_optical_frame",
)
Or:
transform = robot.get_sensor_extrinsic(sensor_id=SensorType.LEFT_ARM_CAMERA)
Logs and Debugging
Where Low-Level Service Logs Are Stored
Low-level services are platform-specific:
- HPU: localization, navigation, planning, perception.
- XCU: control, chassis.
Logs are under /userdata/log/<service_name>/ on the corresponding platform. Examples:
- HPU:
/userdata/log/localization_server/,/userdata/log/service_navigation_plan/,/userdata/log/service_motion_plan/,/userdata/log/Perception_Algorithm_Service/ - XCU:
/userdata/log/SingoriX/,/userdata/log/galbot_chassis_service/,/userdata/log/service_display/,/userdata/log/mission_manager/
Always identify the service platform first, then check logs on that platform.
Where SDK Logs Are Stored
SDK runtime logs (PC or Robot side) are in:
~/galbot_sdk_log/
If you see get info failed or PUBLISH FAIL on PC, check embosa_ip_config.json on both sides first.
How to Enable and Debug Core Dumps
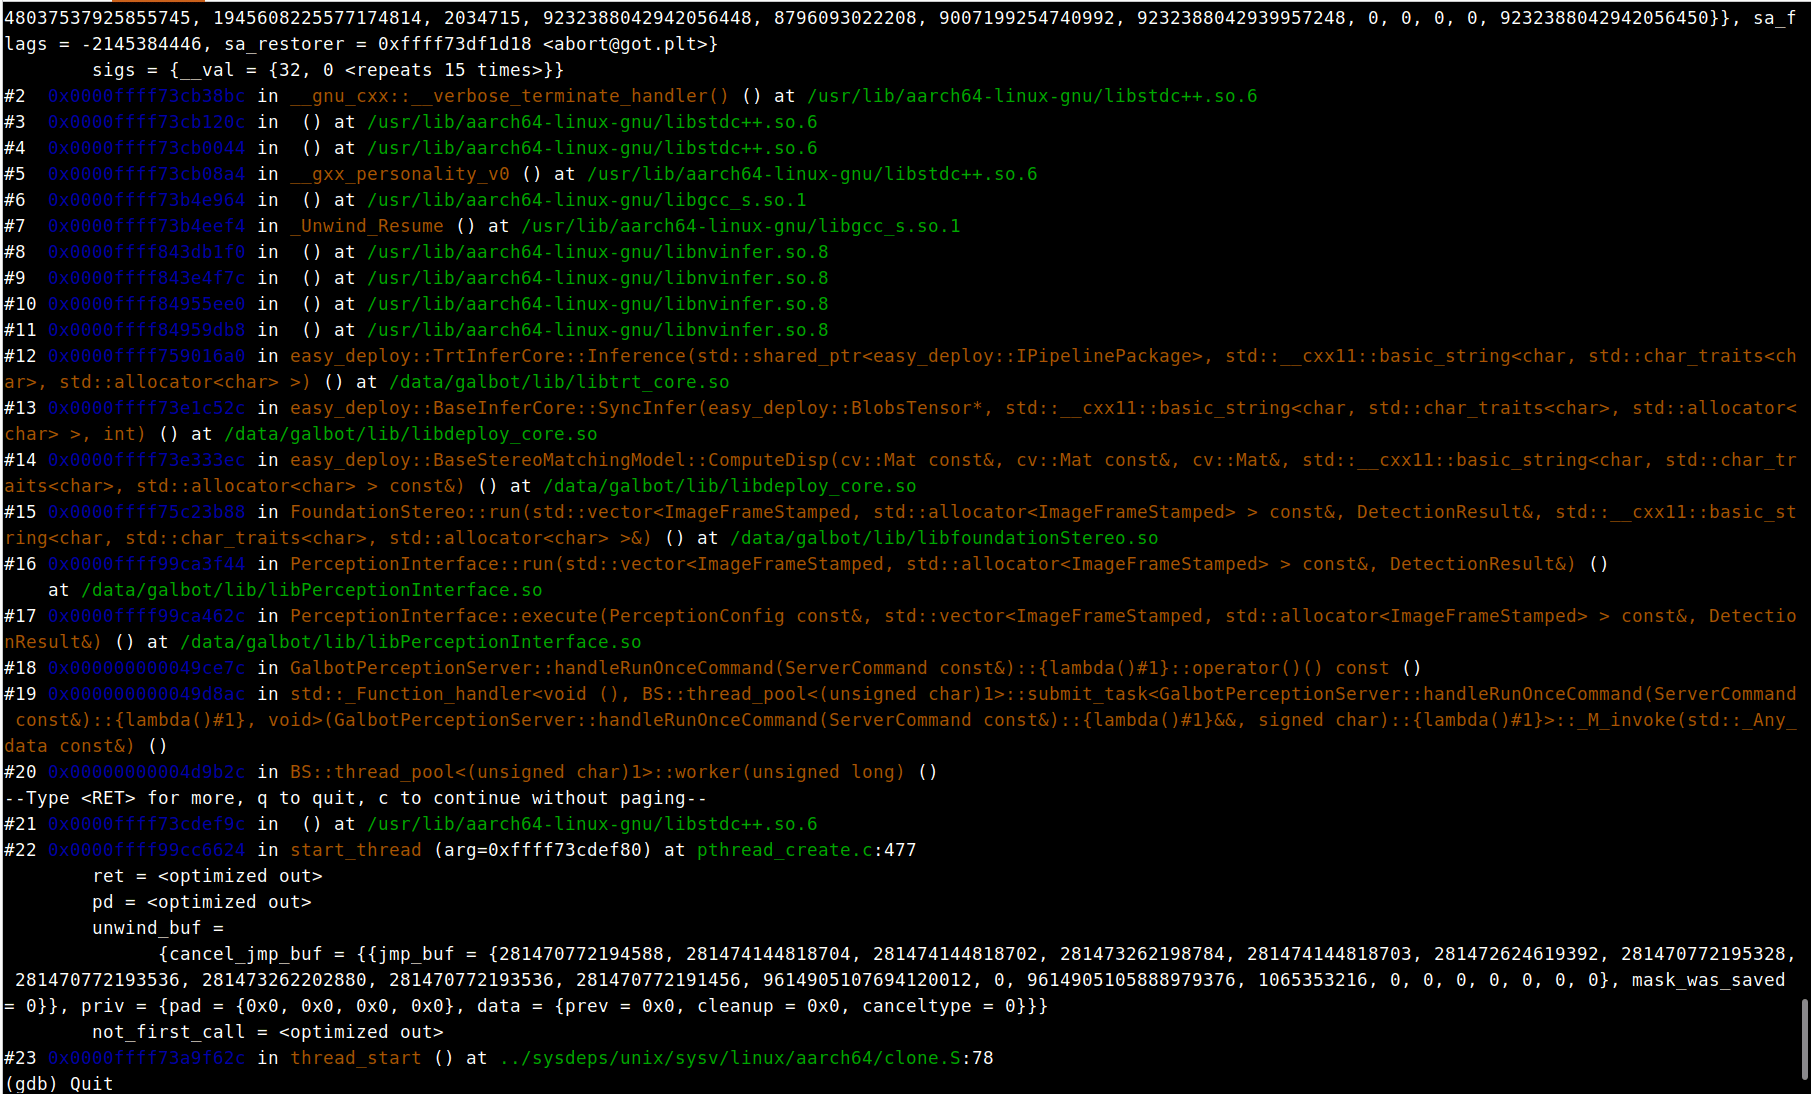
Core dumps are used for service crash analysis. After enabling core dumps and setting path (then relogin shell), files usually appear in:
/userdata/core
For example with mps service:
gdb /data/galbot/bin/service_motion_plan [core_file]
Run bt -full in gdb.
Python on Robot Cannot Find a Module
Add to ~/.bashrc:
export PYTHONPATH=/data/galbot/lib:$PYTHONPATH
Relogin to take effect.
Python Example Error: numpy Has No typeDict
Usually caused by older scipy. Upgrade:
pip install --upgrade scipy
Installation and Environment
How to Start SDK Docker
gunzip -c galbot_sdk_image_1.8.0.tar.gz | docker load
cd output/docker
./run.sh
How to Use Perception Service (GBS 1.15.16+)
On HPU, modify:
/data/galbot/config/galbot_perception_moduleConfig.yaml
Set sensor_data_sync_max_diff_tolerance to 500000 (ns), restart launcher, then validate with examples under examples/g1/python/galbot_perception.
Still Not Resolved?
If your issue is not listed, submit an issue on GitHub:
https://github.com/GalaxyGeneralRobotics/GalbotSDK/issues
Please include SDK/robot versions and problem details. We will assist recovery as soon as possible. You may also contact after-sales technical support directly.